Connecting Network Cables
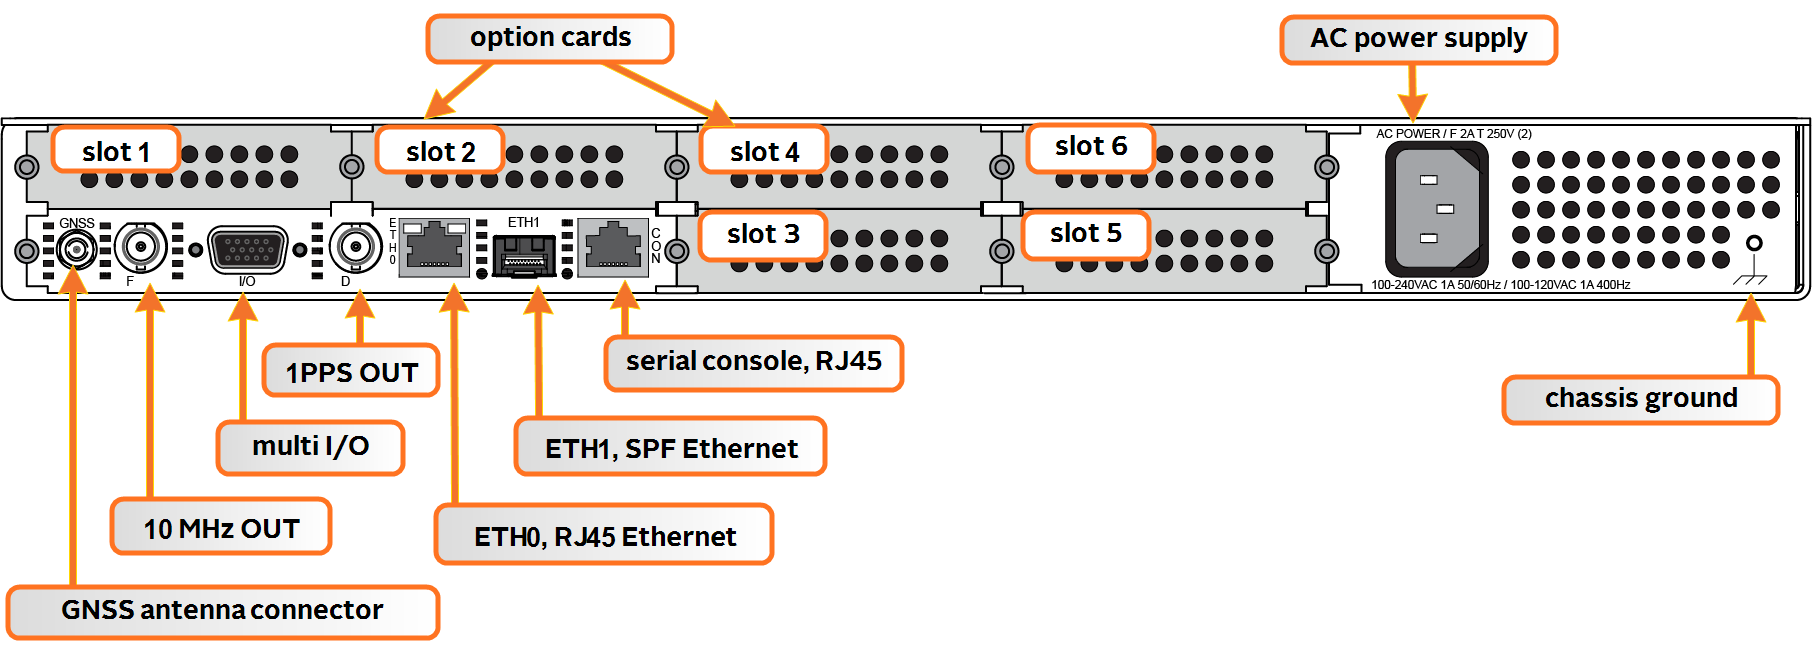
SecureSync includes two BASE 10/100/1000 Ethernet ports (ETH0- RJ45, and ETH1- SFP) for full NTP functionality, as well as a comprehensive web-based user interface ("Web UI") for configuration, monitoring and diagnostic support.
Before connecting the network cable(s), you need to decide which port(s) you want to use for which purpose (e.g., ETH0 for configuration only, etc.), and how you want to configure basic network connectivity e.g., the IP address:
- Configure SecureSync via the unit's front panel
- Configure SecureSync by means of a PC connected to an existing network.
- When connecting to a hub, router, or network computer, use a straight-through wired, shielded CAT 5, Cat 5E or CAT 6 cable with RJ45 connectors (Eth0) or SFP connectors (Eth1). Connect one end to the Ethernet port on the SecureSync rear panel, and the opposite end of the cable to a network hub or switch.
- Configure SecureSync by connecting a stand-alone computer directly via a dedicated network cable (standard-wired, or crossover cable):
- When connecting directly to a stand-alone PC, use a network cable. Connect the cable to the NIC card of the computer.
Since no DHCP server is available in this configuration both SecureSync, and the PC must be configured with static IP addresses that are on the same subnet (10.1.100.1 and 10.1.100.2 with a subnet mask value of 255.255.255.0 on both devices, for example).
- When connecting directly to a stand-alone PC, use a network cable. Connect the cable to the NIC card of the computer.
On Eth0: Once the unit is up and running, verify that the green link light on the Ethernet port is illuminated. The amber “Activity” link light may periodically illuminate when network traffic is present.