+1.585.321.5800
Calibration
Note: This chapter describes the Calibration menu items. Calibration itself should only be attempted by qualified technicians. Alternatively, you can send your GSG unit to Orolia to be calibrated.
Via the Calibration view, you can:
- calibrate the unit’s maximum output power, and OXCO frequency
- view the results of a previous user calibration.
To access the Calibration view, navigate to Options > Calibration:
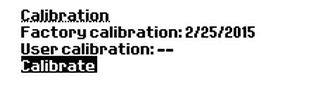
Calibration view
The Calibration view displays when the Factory calibration was done, and if and when the last User calibration was done.
Is recommended that you adhere to the following calibration guidelines:
- Orolia recommends calibration every 2 years to ensure the frequency is within specification and the power levels are correct.
- If your unit is equipped with an Ultra-High-Stability OCXO (an option that is no longer available), Orolia recommends calibration every year for this reference to ensure operation to specifications.
- Regardless of which oscillator option is installed in your GSG unit: If you are testing GPS timing receivers and are testing the precision of the 1 PPS output, comparing it to the 1 PPS output from your device under test, Orolia recommends calibration every year.
To carry out a user calibration, highlight Calibrate and press enter. Confirm your choice, and enter the password, in order to make sure the calibration settings are not changed unintentionally. The password is 62951413 (first 8 digits of π backwards).
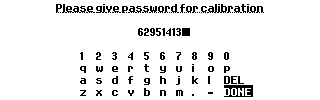
Entering the calibration password
Note: It is strongly advised to write down the current values before making any changes. Once new values are saved, the old values cannot be recalled.

User Calibration view
During the calibration, the unit generates an unmodulated signal at full power. Maximum RF power is measured by a spectrum analyzer connected to the RF output of your GSG unit.
The OCXO DAC value is adjusted according to the frequency measured by the GSG unit from the 10 MHz output at the back panel. Using a frequency counter, adjust the OCXO value until the GSG shows 10 MHz.
The PPS delay is essentially an “equipment delay” of the generated signal. To measure it properly, you need to measure the difference between the GSG's PPS out (Trigger out) and the PPS out of a trusted GPS timing receiver. The value is always positive, and is set in microseconds. Three digits can be given, enabling nanosecond resolution. The allowed range is [0.000-4.000] microseconds.
Note that if you try to measure this delay, remember to take into account the GPS time to UTC time offset set in the scenario you use. Timing receivers typically output the UTC synchronized PPS signal.
After the calibration is complete, the new values can be saved by pressing exit or menu. Press cancel to discard the values and keep the previous calibration settings.