+1.585.321.5800
"Start" Menu
To start the currently loaded scenario (as previously selected using the "Select" Menu), highlight the main menu option Start by pressing the arrow keys. Then press enter.
In its default mode, the GSG simulator will launch the scenario (the delay depends on the size/complexity of the scenario data), and then automatically run the scenario.
To stop the scenario, press exit or cancel, and confirm.
There are, however, interesting alternatives to starting a scenario, mainly to facilitate test automation. The illustration below summarizes the start variations discussed underneath.
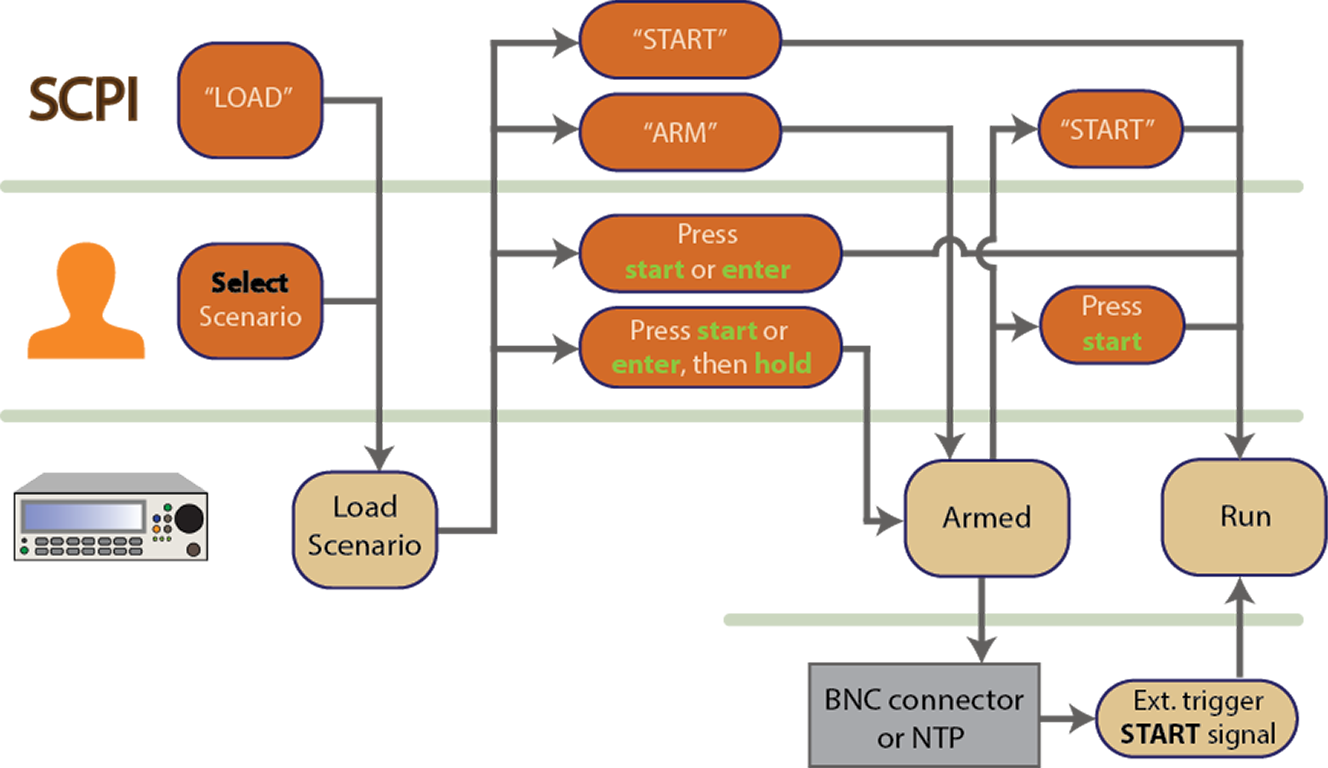
Scenario start variations – Flowchart
Scenario Start Variations
Once you pressed start, or enter (with the Start main menu option highlighted), the GSG unit requires some time to launch the scenario (the delay depends on the size/complexity of the scenario data).
During this wait time, press the [.] (hold) key if you want to prevent the scenario from beginning to run before you are ready. This is called "arming" (the ARM text icon will display in the upper right corner of the display, and the armed status indicator will light up).
Once you are ready, press the start key to run the armed scenario.
Once you submitted the SCPI command SOURce:SCENario:LOAD, submit another command to arm the GSG simulator:
SOURce:SCENario:CONTrol ARM.
Then, to start scenario execution, submit the SCPI start command:
SOURCce:SCNario:CONTrol START.
After arming a loaded scenario (see above), the scenario execution can be started via an external trigger signal, submitted to the GSG unit by means of the BNC input (see "External Trigger Input" under Rear Panel Outputs and Inputs).