+1.585.321.5800
Setting Up an IP Address via the Front Panel
Assigning an IP address to SecureSync, using the front panel keypad and information display is a preferred way to provide network access to the unit, thus enabling you thereafter to complete the setup process via the Web UI.
Keypad Operation

The functions of the six keys are:
- < > arrow keys: Navigate to a menu option (will be highlighted)
- ˄ ˅ arrow keys: Scroll through parameter values in edit displays
 ENTER key: Select a menu option, or load a parameter when editing
 BACK key: Return to previous display or abort an edit process
An illustration showing how to navigate the front panel menu tree can be found here: Front Panel Keypad, and Display
IP configuration, step-by-step instructions:
- Disable DHCP:
- Press the key.
- Using the arrow key, select
Netv4from the menu.
(To select a menu item, highlight it using the arrow keys, then press the key.) - Select the Ethernet interface for which DHCP is to be disabled, such as
eth0. - Select
DHCPfrom the next menu. The display will showState=EnabledandAction=Disabled.(The State is the current DHCP setting and the Action is the action to take. You can only change the Action setting.)
- Press the key once to select the action, then again to apply it.
- Press the
- Enter IP Address and Subnet Mask:
- Still on the
Home > Netv4 > eth[0-3]menu, selectIP Address, and change "N=010.010.201.001/16” to the value of the static IP address and subnet mask/network bits to be assigned (for a list of subnet mask values refer to the table Subnet mask values). - Press the key once to enter the setting, then again to apply the new setting.
- Still on the
- Enter the Gateway Address (if required)
- Still on the
Home > Netv4menu, select theGatewayoption (Home > Netv4 > eth0 > Gateway). - Press the key once to enter the setting, then again to apply the new setting.
- The display will change, allowing you to input an address at N=000.000.000.001. Enter the gateway address here. The address entered must correspond to the same network IP address assigned to SecureSync.
- Still on the
- Enable/disable the Port (if required)
- Still on the
Home > Netv4menu, select theeth[X]port that you want to enable or disable. - Navigate to the
Portoption (Home > Netv4 > eth0 > Port). - Press the ˄ ˅ arrow keys once to change between Enable and Disable.
Note: By default,
eth0is enabled, while all other ports are disabled. - Still on the
After all applicable settings have been updated, press the key three times to return to the main display. It should now resemble the following example:
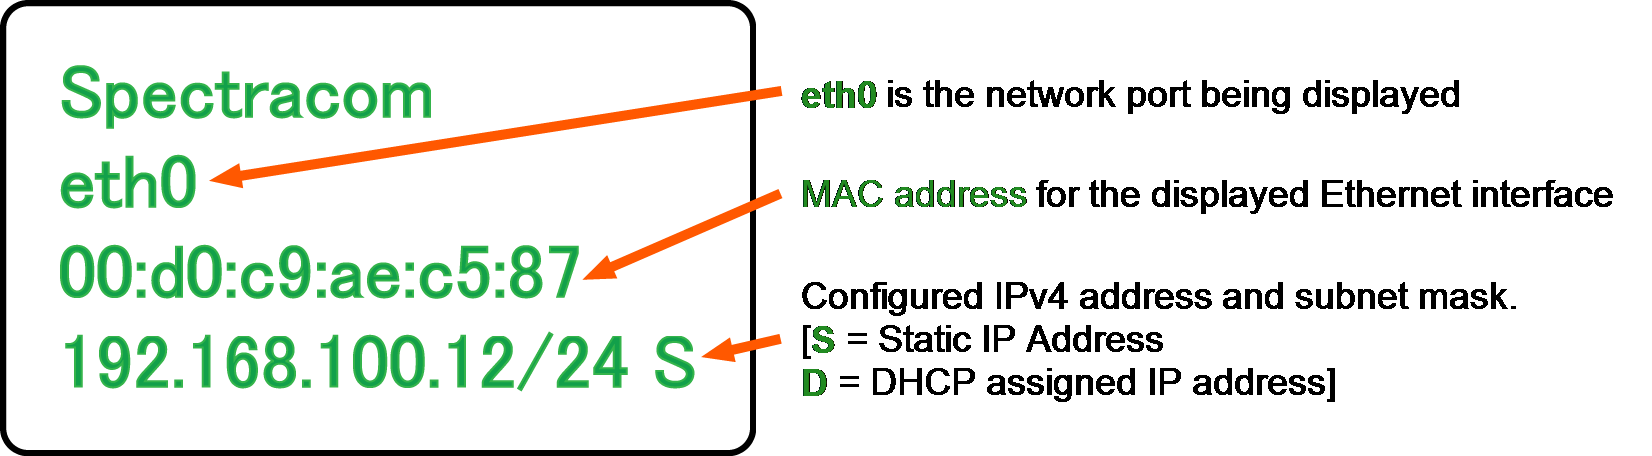
Note: Despite having entered an IP address, the information display will show 0.0.0.0 if SecureSync could not detect an active link on the corresponding network interface.
Note: About DNS: The Primary and Secondary DNS servers are set automatically if using DHCP. If DHCP is not available, they can be configured manually in the SecureSync Web UI via the Network/General Setup screen.
The remainder of the configuration settings will be performed via the Web UI (accessed via an external workstation with a web browser such as Firefox® or Chrome®). For more information, see The Web UI HOME Screen.