+1.585.321.5800
Applying a License File
Software options must be activated by applying a license file (OPT-xyz):
Typically, SecureSync units are shipped with the license file pre-installed, reflecting the system configuration as ordered. If, however, a feature is to be activated after delivery of the SecureSync unit, please contact your local Orolia Sales Office first to have a license file generated. License files are archive files with a tar.gz extension. One license file may contain multiple licenses for multiple products.
To apply the license file, you need to upload it into your SecureSync unit and install it:
- Save the license file
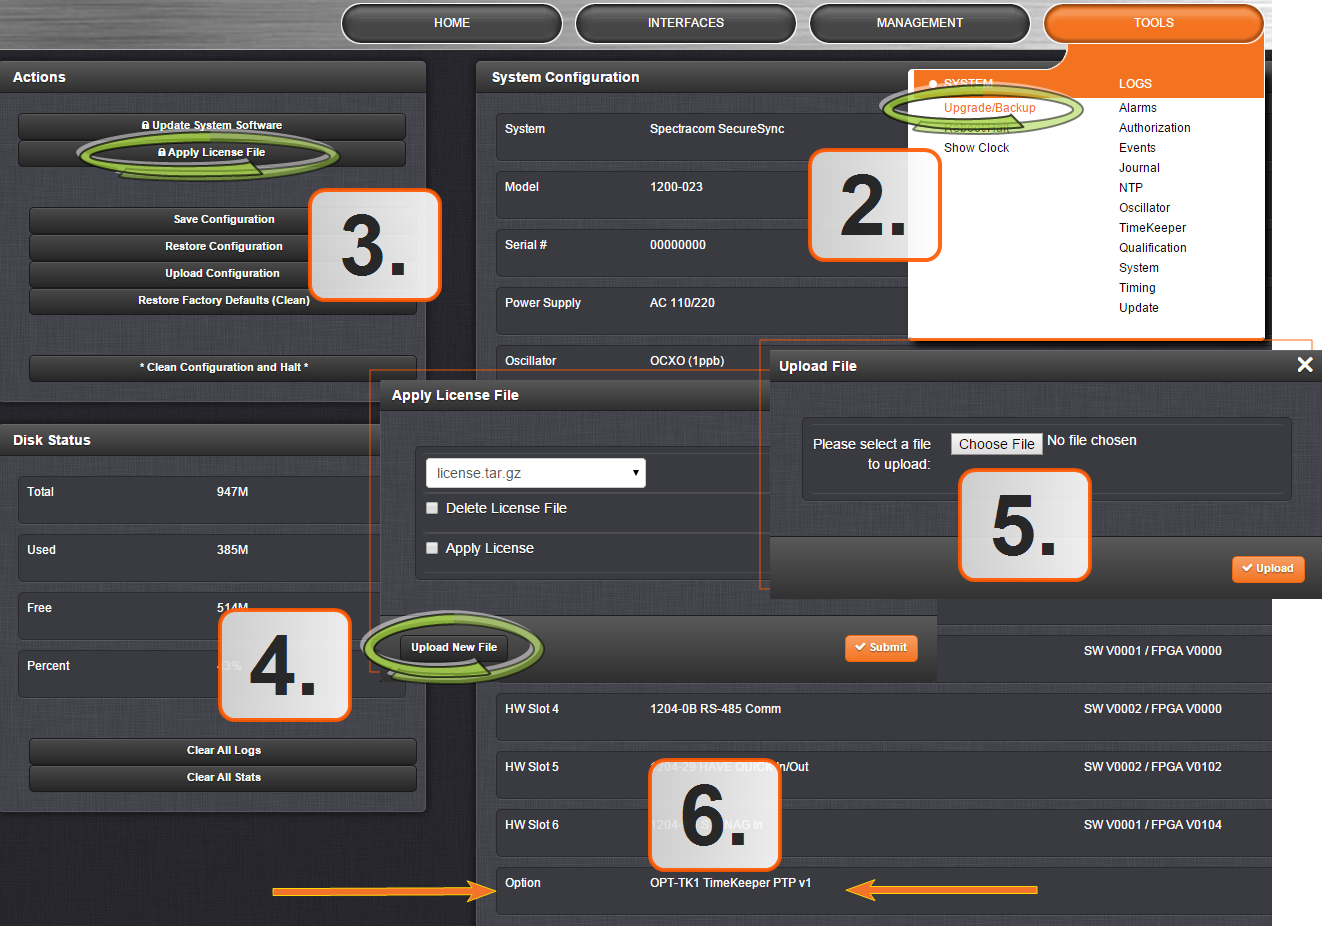
license.tar.gzto a location on your PC (which needs to be connected to the same network SecureSync is.) - Open the SecureSync Web UI, and navigate to Tools > Upgrade/Backup:
- In the Actions panel, click Apply License File.
- In the Apply License File window, click Upload New File.
- In the Upload File window, click Choose File. Using the Explorer window, navigate to the location mentioned under the first step, select the license file, and monitor the installation progress in the Status Upgrade window until the application has rebooted.
- Refresh the browser window, and login to the Web UI again. Re-navigate to Tools > Upgrade/Backup, and confirm that the newly installed Option is listed in the System Configuration panel.