+1.585.321.5800
Configuring Network Settings
Before configuring the network settings, you need to setup access to VersaPNT web user interface ("Web UI"). This can be done by assigning a static IP address, or using a DHCP address. For more information, see Assigning a Static IP Address.
Once you have assigned the IP address, login to the Web UI. For more information, see Accessing the Web UI.
To configure network settings, or monitor your network, navigate to VersaPNT's Network Setup screen.
To access the Network Setup screen:
- Navigate to MANAGEMENT > Network Setup. The Network Setup screen is divided into three panels:
- General Settings: Allows quick access to the primary network settings necessary to connect VersaPNT to a network. See General Network Settings.
- Web Interface Settings:
- Web interface timeout: Determines how long a user can stay logged on. For more information, see Web UI Timeout.
- Access Control: Allows the configuration of access restrictions from assigned networks/nodes.
- Login Banner: Allows the administrator to configure a custom banner message to be displayed on the VersaPNT Web UI login page and the CLI (Note: There is a 2000 character size limit).
- SSH: This button takes you to the SSH Setup window. For details on setting up SSH, see SSH.
- System Time Message: Setup a once-per-second time message to be sent to receivers via multicast. For details, see System Time Message.
- INFO button: Displays the Ethernet port Status window for review purposes.
- GEAR button: Displays the Ethernet port settings window for editing purposes.
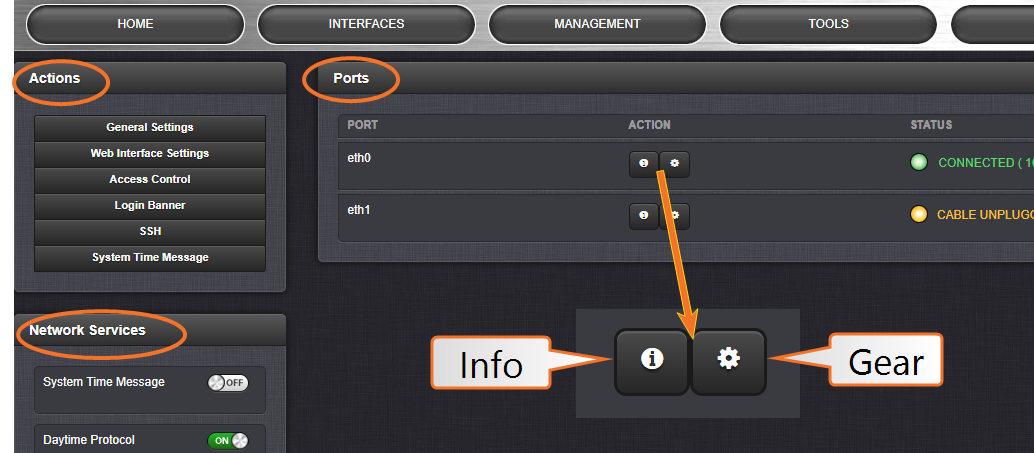
The Actions panel provides:
The Network Services panel is used to enable (ON) and disable (OFF) network services, as well as the Web UI display mode, details see: Network Services.
The Ports panel not only displays STATUS information, but is used also to set up and manage VersaPNT’s network ports via three buttons: