Assigning a Static IP Address
There are two ways to setup a permanent static IP address, after connecting VersaSync to a network:
Assigning a Static IP Address Using the CLI:
Note: For your reference, the command helpcli produces a list of available commands. Press the space key to display the next page, or the b key to display the previous page. To leave the command help file, press Q or Ctrl C.
Open the serial console, using a terminal emulator program
- If necessary, disable DHCP – Command:
dhcp4set <x> off(where x is 0/1 for ETH0 and ETH1, respectively). -
Set the static IP address – Command:
ip4set <x>.<IP address>.<subnet mask>Example:ip4set 0 10.2.100.245 255.255.0.0If required, also set your gateway address:
gw4set <x> <gateway address> - Verify that the address has been accepted – Command:
net4 - If so required, turn DHCP back on – Command:
dhcp4set [x] on
Assigning a Static IP Address Using the Web UI:
- Enter the IP address identified during setup (Initial Network Setup) into the address field of your browser (on a computer connected to the VersaSync network). If the network supports DNS, the hostname may also be entered instead (the default hostname is "Spectracom"). The start screen of the VersaSync Web UI will be displayed.
- Log into the Web UI as an administrator. The factory-default user name and password are:
Username:spadminPassword:admin123 -
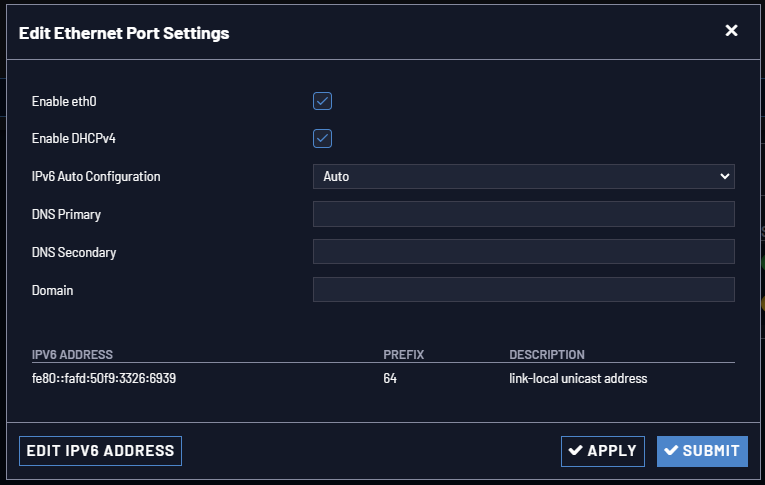
If necessary, disable DHCP by navigating to MANAGEMENT > Network Setup. In the Ports panel on the right, click the GEAR icon next to the Ethernet Port you are using. In the Edit Ethernet Port Settings window, uncheck the Enable DHCPv4 field. Do NOT click Submit or Apply until you complete the next step to avoid error messages.
-
In the fields below the Enable DHCPv4 checkbox, enter the desired Static IP address, Netmask, and Gateway address (if required). Click Submit.
For subnet mask values, see Subnet Mask Values.

- To verify that the address has been accepted, enter the static IP address into the address field of the browser and log into the Web UI again.
- To continue with your configuration; see: Configuring Network Settings.